Download WinMX 3.53 or WinMX 3.54, both versions of WinMX from this website have been patched with our new MXPie Patch United v1.0... Don’t worry if you already have WinMX installed on your computer, this installer contains both WinMX and MXPie Patch United v1.0 and no saved WinMX settings will be overwritten.
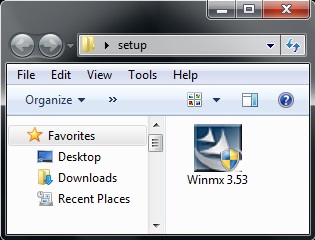
Double click on the WinMX installer to begin the installation process, Vista or Windows 7 users might want to right click on the WinMX installer and then select run as administrator....
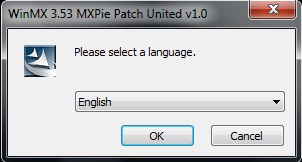
By default the installer should use the same language as you use on your computer. If you wish to run the setup wizard in another language then select your language from the drop down menu... To continue click on the OK button.
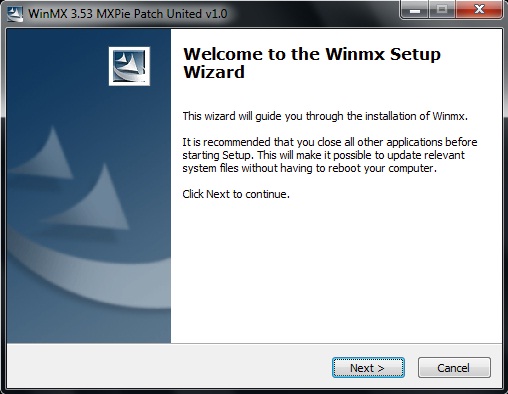
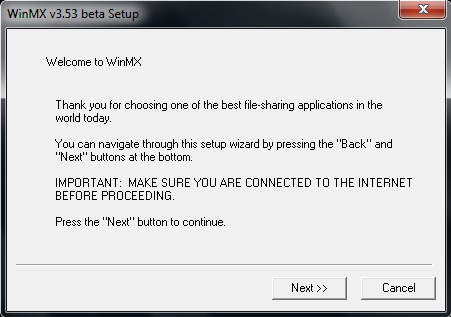
Click on the Next > button...
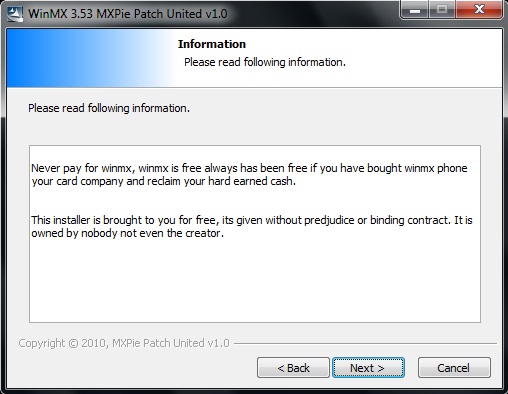
Click on the Next > button...
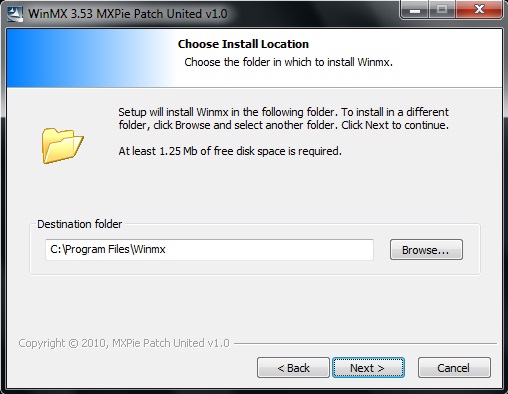
Choose the location you wish WinMX to be installed to (we recommended unless you are an advanced WinMX user to use the default location of: “C:\Program Files\Winmx”) Click on the Next > button to continue...
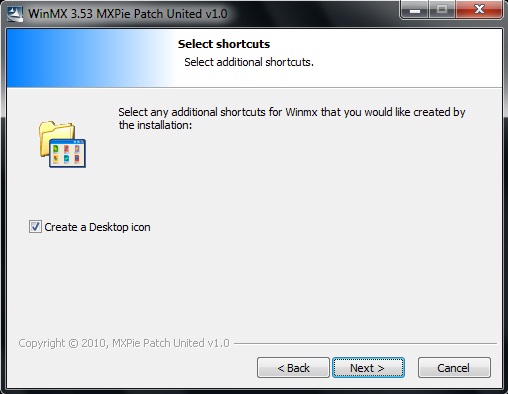
Create a desktop icon? By default the installer will create a short cut, that will be found on your desktop... If you don’t want the installer to create a desktop icon, then remove the check from the “Create a Desktop icon” box, otherwise click on the Next > button to continue...
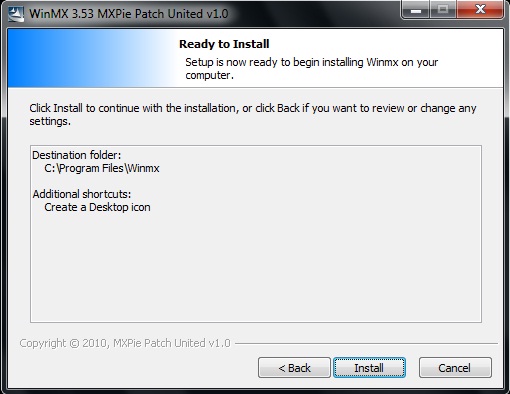
The setup wizard is now ready to install WinMX on to your computer... Click on the < Back button if you want to review any changes or settings otherwise click on the Install button to continue with the installation...
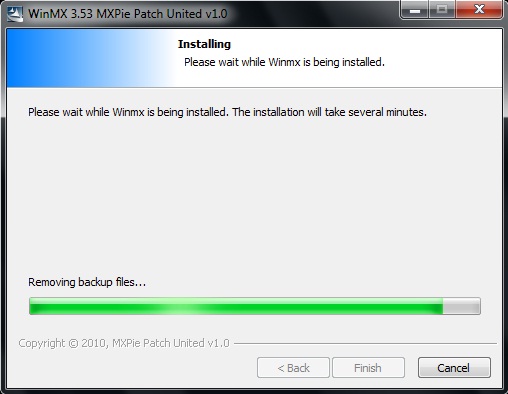
Please wait while WinMX is being installed to your computer. The installation procecss will take several minutes. During this time the installer will look for any older patches for WinMX and remove them if any older patches exist...
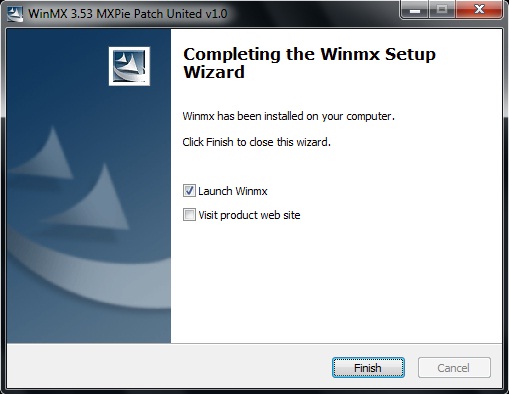
Completing the WinMX setup wizard for MXPie Patch United v1.0... By default when you click on the Finish button this will complete the MXPie Patch United v1.0 setup wizard and then launch the WinMX setup wizard. If you don’t wish to launch the WinMX setup wizard at this point then uncheck the “Launch Winmx” box (We recommend you leave all settings as default). If you would like visit the project’s web site, then put a check in the “Visit the product web site” box. Click on the Finish button to continue...
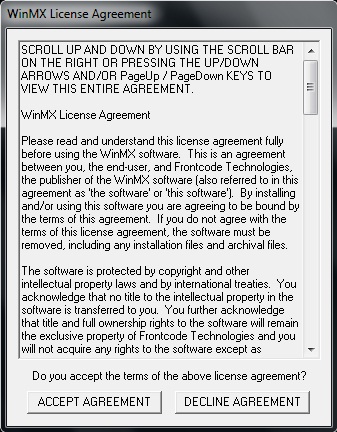
Accept the licence agreement...
Click on the Next >> button...
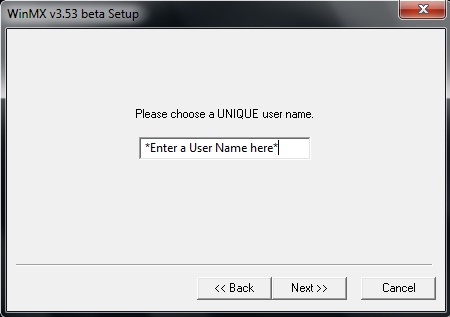
Please enter a unique username and then click on the Next >> button to continue.
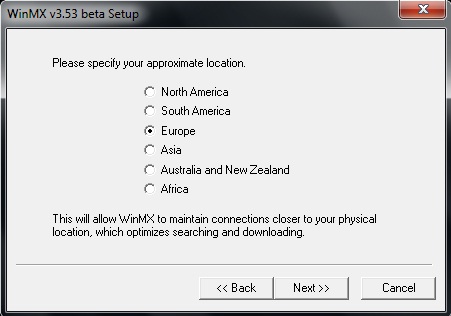
Select your approximate location and then click on the Next >> button...
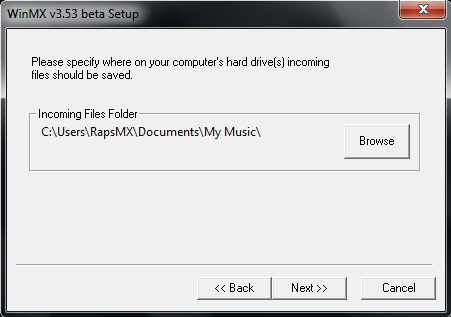
Please specify where on your computer’s hard drive or external hard drive you want incoming files to be saved. Use the Browse button to browse to a new location for incoming files to be saved to. If you are happy with the default location of My Music then click on the Next >> button to continue...
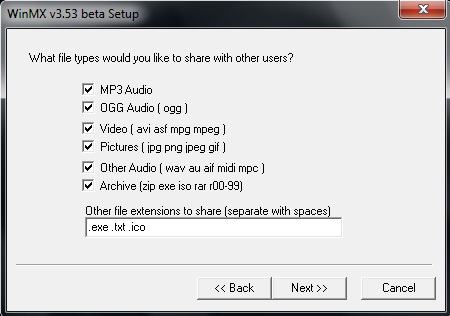
What file type would you like to share with users? We recommend you select all the boxes, but this is your own choice. Other file extensions to be shared that are not shown there by default can be added in the text box e.g. “.exe .txt .ico .html .html etc... Click on the Next >> button to continue.
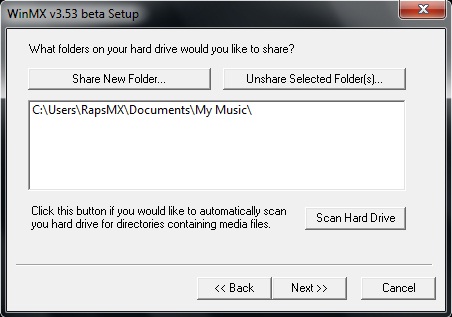
What folder on your hard drive would you like to share? To share a folder through WinMX then click on the “Share New Folder button and then browse to that folder you wish to share. (DON’T Scan Hard Drive, we DO NOT recommend you do this as you could end up sharing the whole contents of your computer). Click on the Next >> button to continue...
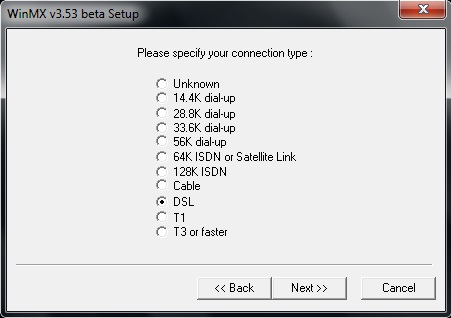
Please specify your connection type? By default the connection type is “Unknown” if you know your connection type then select it, otherwise if you are unsure of your connection type then just leave it as Unknown and then click on the Next >> button...
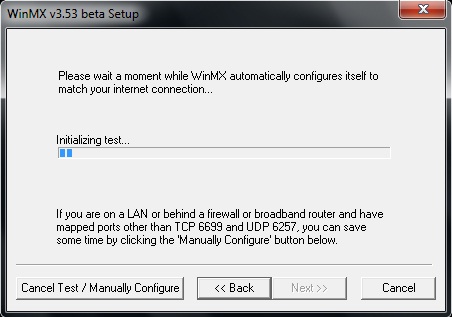
Please wait a moment while WinMX automatically configures itself to match your internet connection (We recommend you cancel this test by clicking on the “Cancel Test / Manually Configure” button...
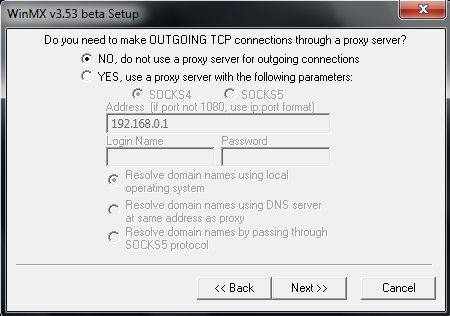
Do you need to make an outgoing TCP connection through a proxy server? The answer to that is NO... Leave the check next to “No, do not use a proxy server for outgoing connections” click on the Next >> button to continue...

Can this computer receive incoming TCP connection from the internet? If your computer is connected direct to a DSL or Cable modem then you can go ahead and select “Yes, this computer is able to receive incoming TCP connections.” otherwise if you are connected direct to a router then the ports that WinMX uses won’t be open by default, so you would have to login to your router and open the ports that WinMX uses. If you don’t understand this then don’t worry about it at this time, just leave the default setting as “No, incoming TCP connections are restricted on this computer and there is nothing I can do about it.” Click on the Next >> button to continue...
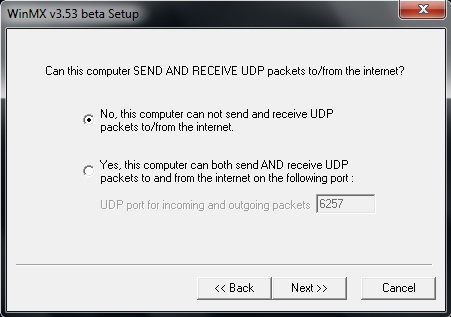
Can this computer send and receive UDP packets to/from the internet? If your computer is connected direct to a DSL or Cable modem then you can go ahead and select “Yes, this computer can both send and receive UDP packets to and from the internet on the following port.” otherwise if you are connected direct to a router then the ports that WinMX uses won’t be open by default, so you would have to login to your router and open the ports that WinMX uses. If you don’t understand this then don’t worry about it at this time, just leave the default setting as “No, this computer can not send and receive UDP packets to/from the internet.” Click on the Next >> button to continue...
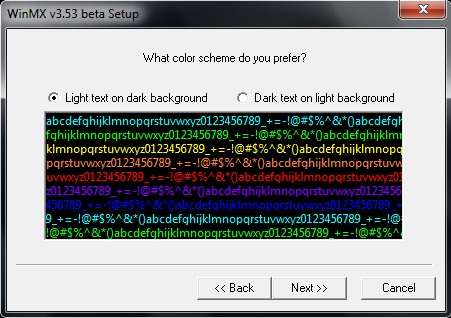
What colour scheme do you prefer? This is really a personal preference, by default it is set as “Light text on dark background” or you can select “Dark text on light background” I prefer the default option but this is your own choice... Click on the Next >> button to continue...
Congratulations, the WinMX setup wizard has now completed... Click on the Next >> button to launch WinMX for the first time...
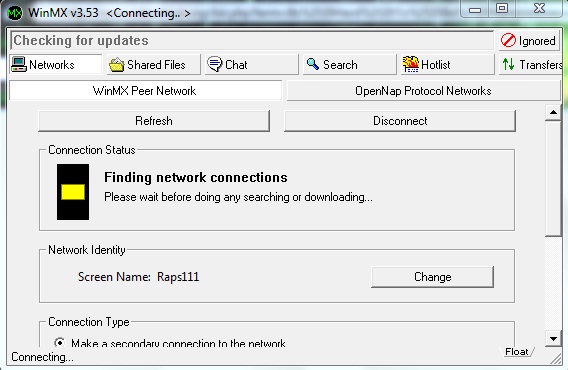
WinMX attempts to connect, also notice the WinMX main bar “Checking for Updates” this is the MXPie Patch United v1.0” checking the server for any updates. Finding network connections, please wait for WinMX to connect before doing any searching or downloading...

Once you see the green light you are ready to go. It is now ok to search and to download. Enjoy WinMX... If for whatever reason WinMX doesn’t connect then you can click on the “Chat” button, copy the help channel hash below and paste it in the filter, then click on the join button. This should navigate you direct to one of our MXPie help channels where our team and helpers are waiting to assist you with any WinMX issues you may encounter while using WinMX. Or if you rather use the forum, then go-ahead and start a new topic.
If you have been following this tutorial step by step then you will now be connected to the WinMX Peer Network using a secondary connection. When you connect to the network using a secondary connection this is only made possible because of all the primary users on the network. You are connecting as a secondary connection through another WinMX user who is connected as a primary connection. A primary connection on WinMX is the backbone of the WinMX Peer network so we try and encourage all WinMX users, if you are able to make a primary connection then please do connect as a primary connection. We will also provide you one to one help if you require help to setup WinMX up as a primary connection...
Before you can run a primary connection you must have the right settings setup...
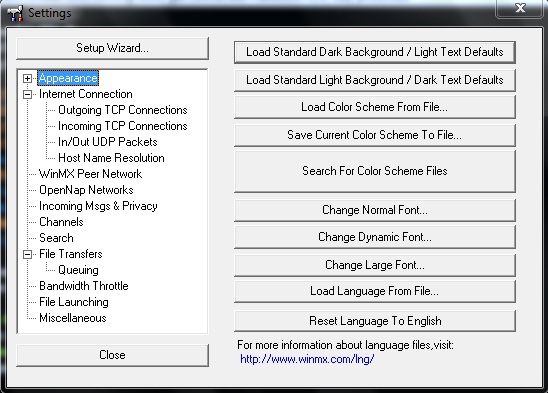
Click on the “Settings” button found at the top of your WinMX client...
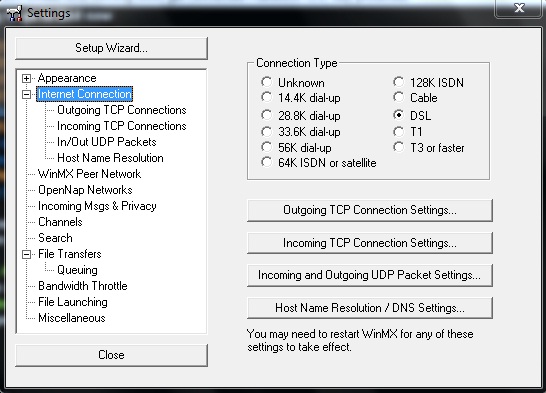
Select "Internet Connection" and then select your connection type (Connection type unknown or slower than Cable, DSL, T1, T3, may not be able to use a primary connection). If you don’t know what your connection type is then I suggest you visit, whatismyipaddress.com:
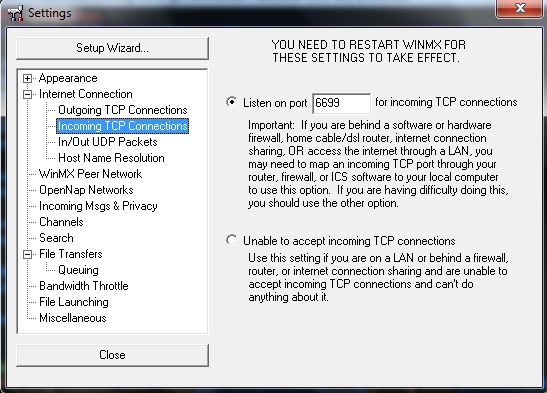
Select “Incoming TCP Connections”. Put a check mark next to “Listen on port [6699] for incoming TCP connections"...
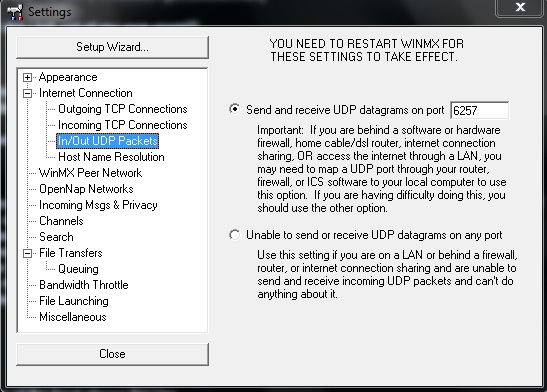
Select “In/Out UDP Packets”. Put a check mark next to “Send and receive UDP datagrams on port [6257]"...
Once you have altered the settings, you must restart WinMX before the new settings can take effect.
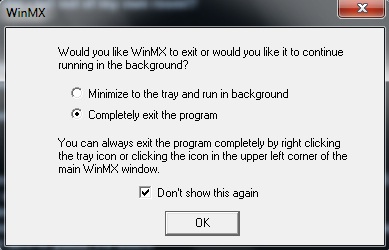
When you exit WinMX you will see a prompt box and by default it is selected to “Minimize to the tray and run in background”. Change this and put a check next to the “Completely exit the program”, leave the check mark next to “Don’t show this again” then click on the OK button...
If you don’t see this prompt box then WinMX may still be running so check your systems tray and look for the WinMX icon, right click on it and select Exit.
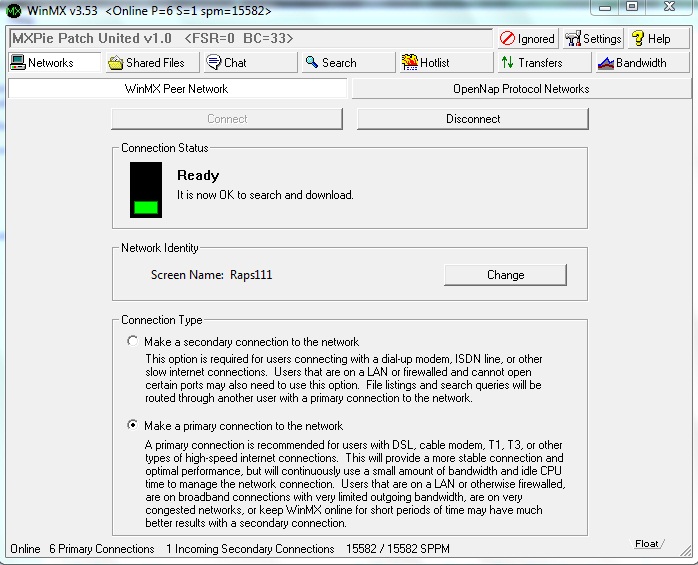
Re-start WinMX and then put a check mark next to “Make a primary connection to the network” and wait for WinMX to reconnect...
If your computer is connected direct to a modem then your WinMX will be connected as a primary connection and everything should be working as it should... If you are connecting through a router then you will have to open the TCP and UDP ports that WinMX use...
If you have no idea how to open the ports in your router then just follow the steps here: